

Rebuilding a vSAN Node with a failed boot disk


The Backstory
Hi all,
Recently I received alerts from my vCenter 7.0 installation that 2 of the nodes in my vSAN cluster were getting hit with the following error:

"Lost connectivity to the device mpx.vmhba32:C0:T0:L0 backing the boot filesystem /vmfs/devices/disk/mpx.vmhba32:C0:T0:L0. As a result, host configuration changes will not be saved to persistent storage."
This is unfortunate. When I built my Home Lab, I did so using a depreciated boot media - a USB Drive. I made this decision due to the limited internal connectivity of my Shuttle DH310v2s.
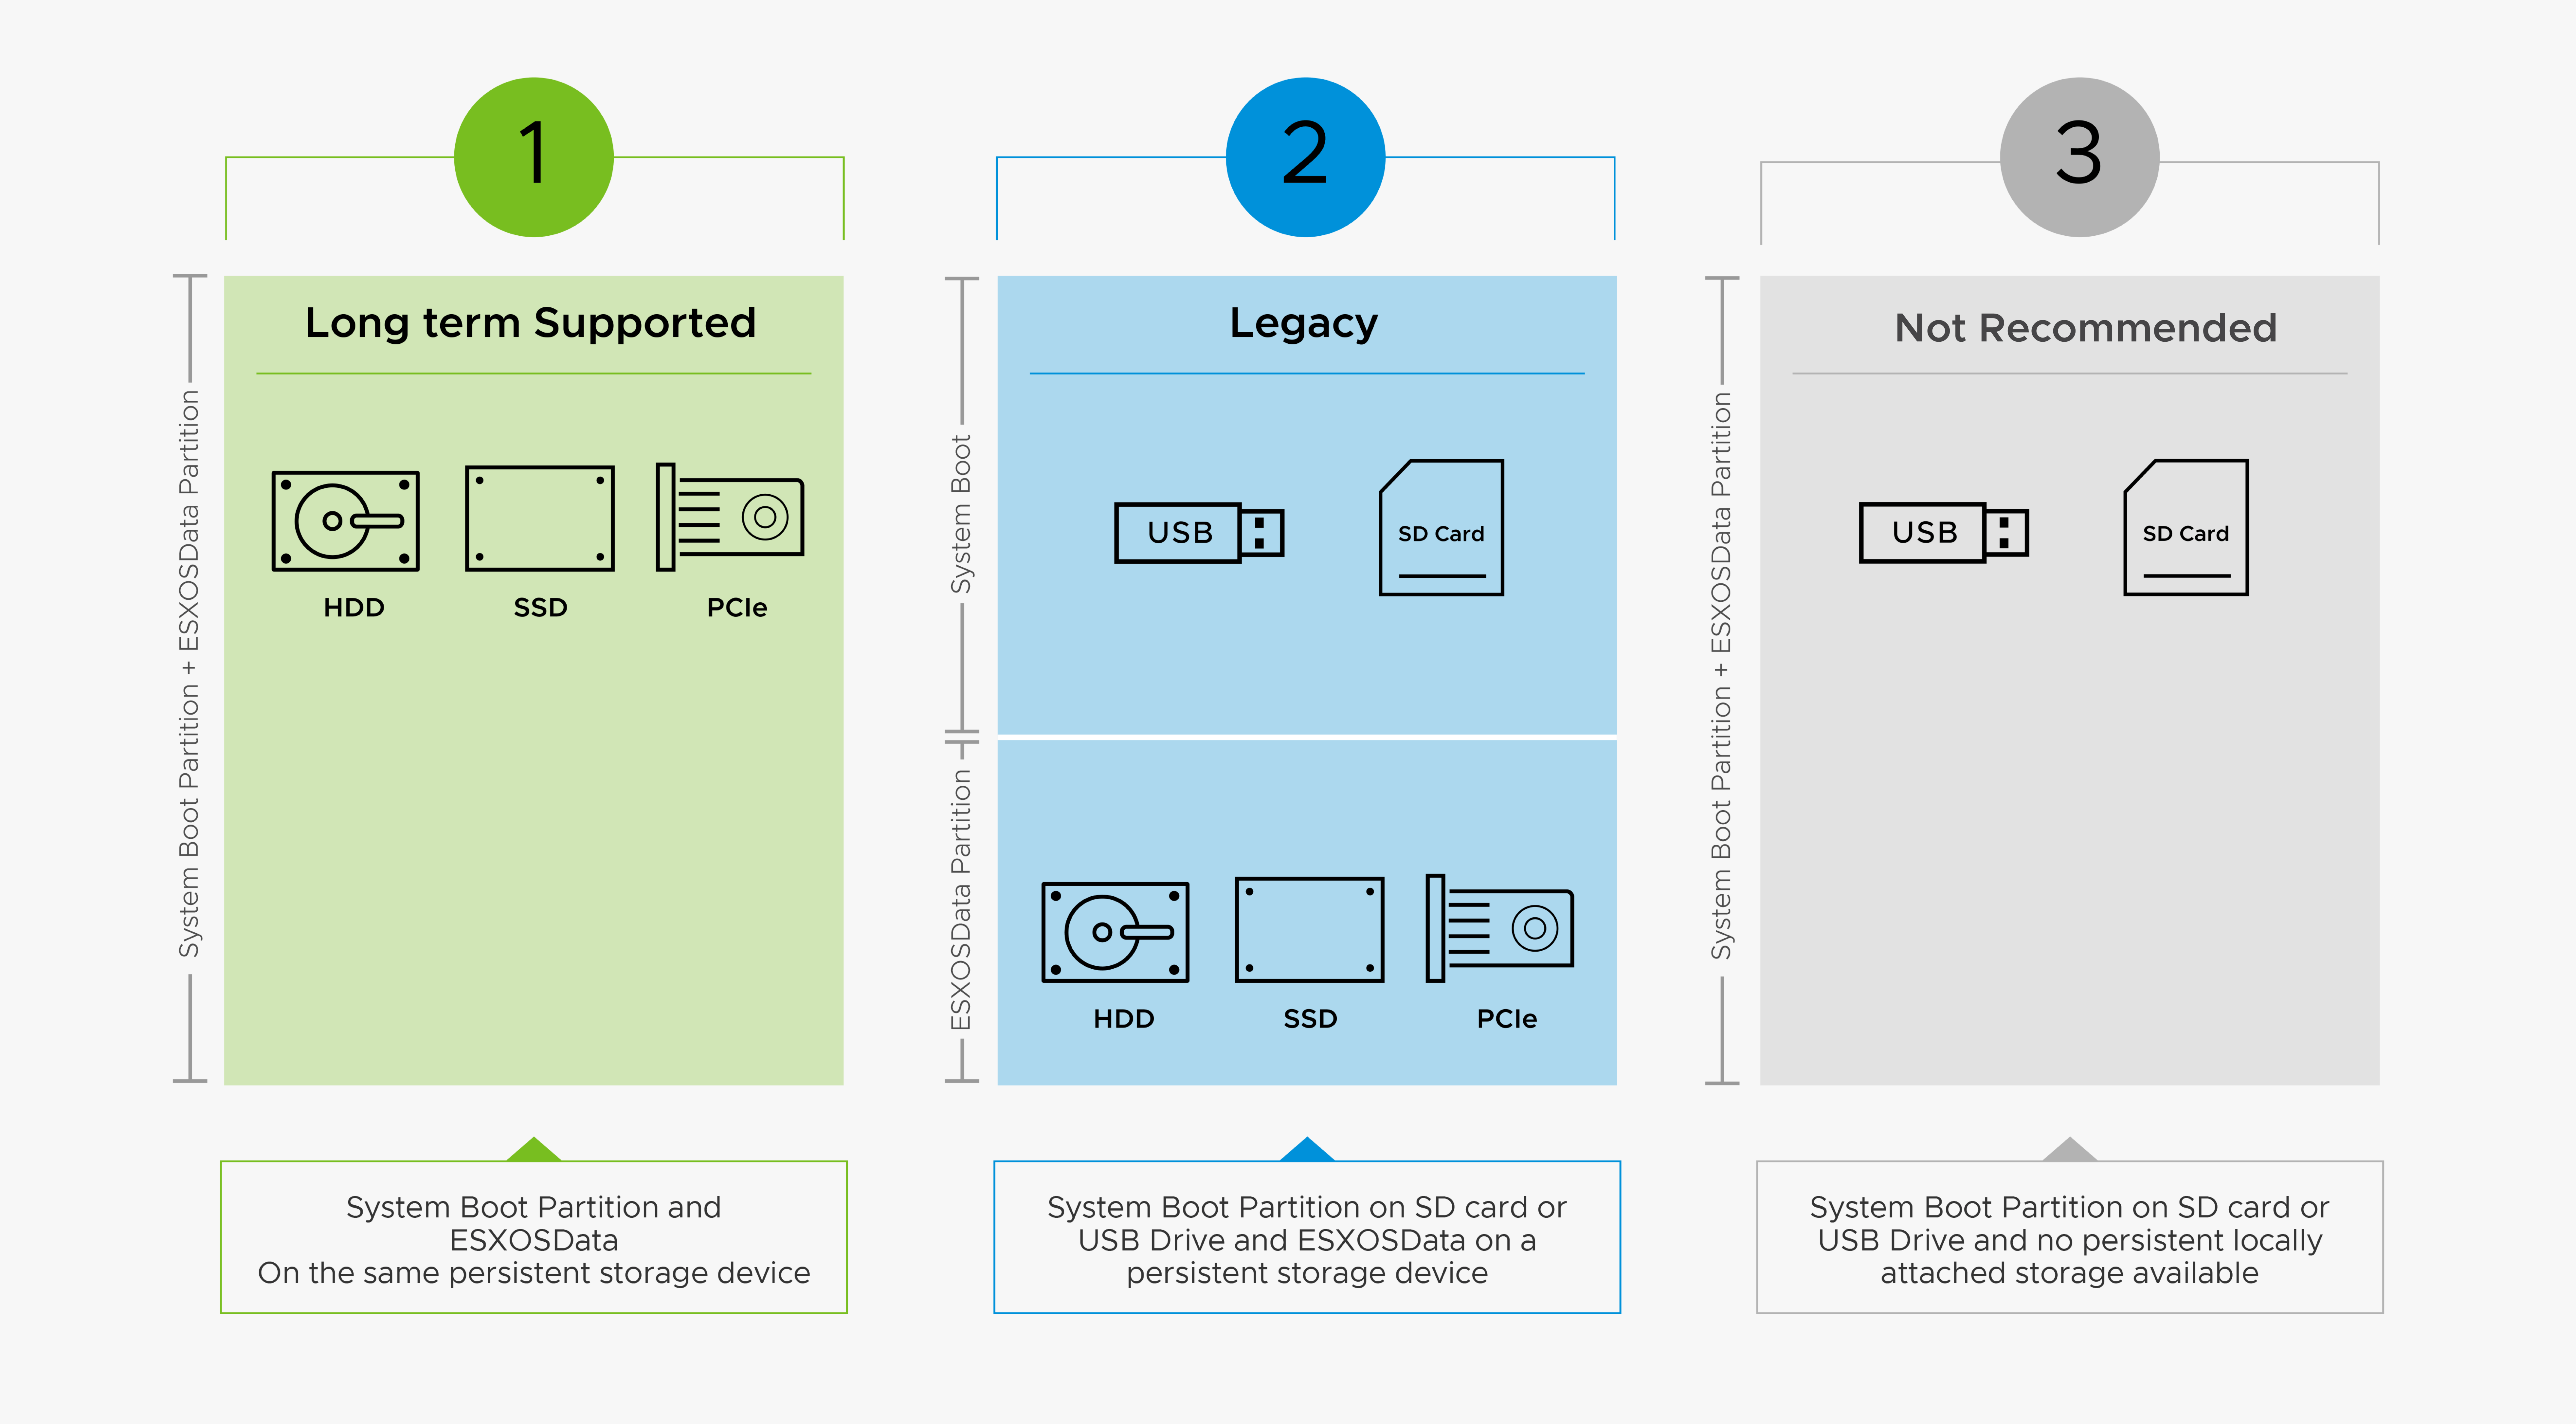
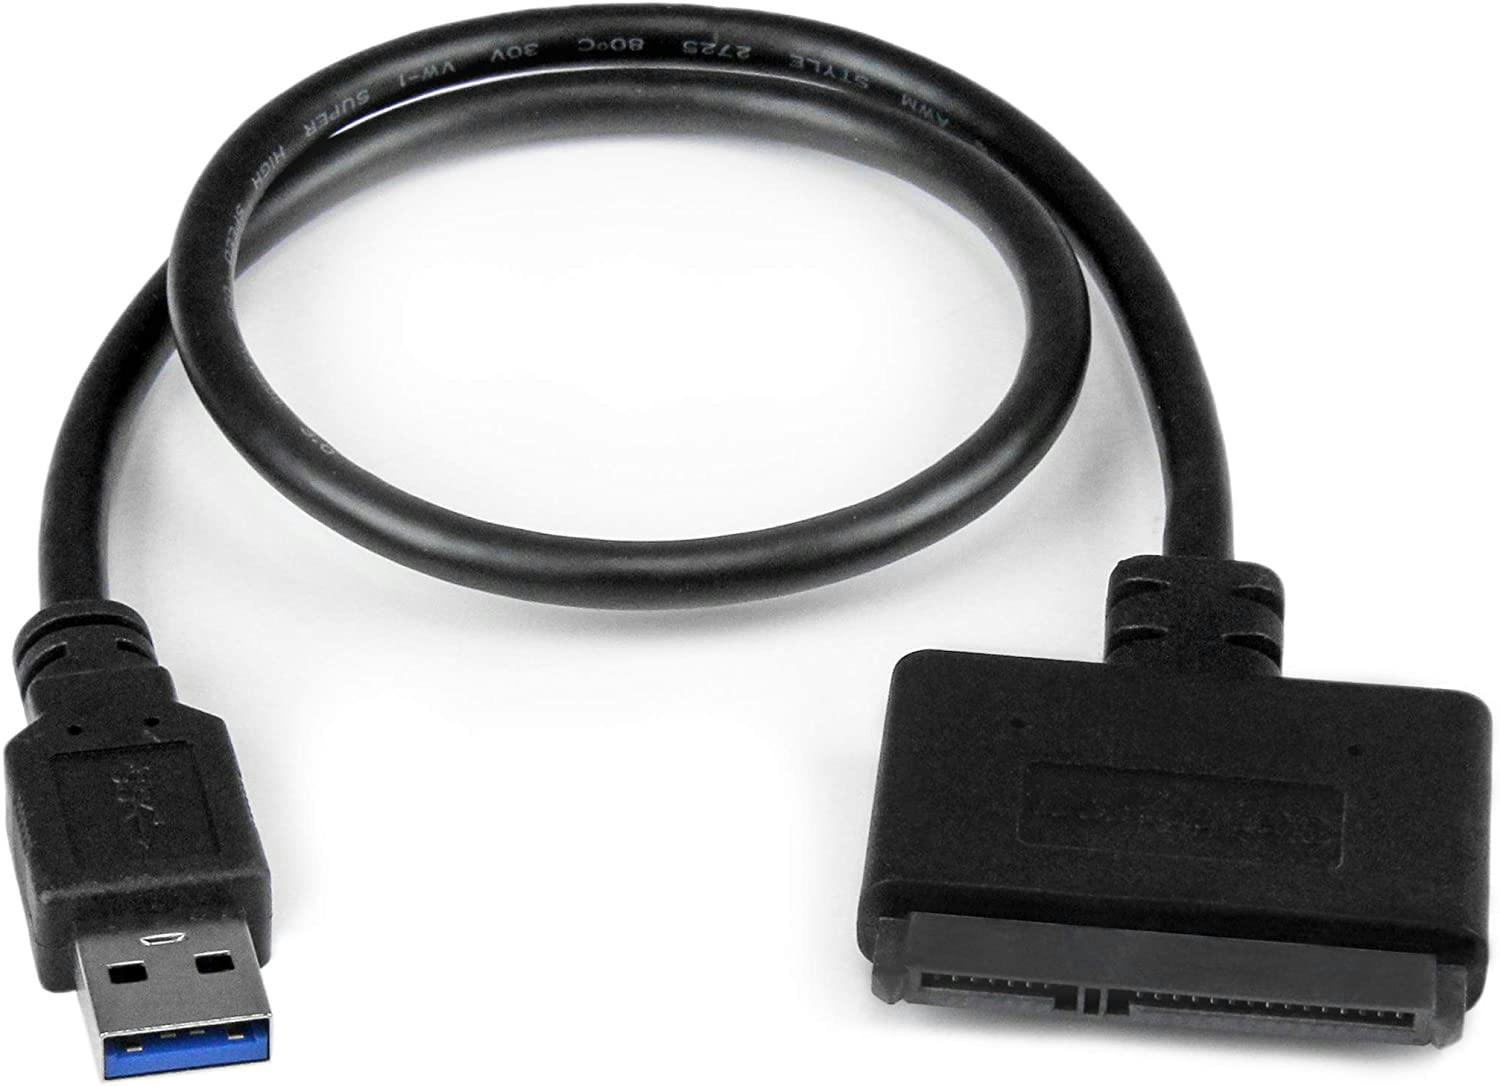
In hindsight, I should have installed my nodes with the configuration I am now migrating to. I am using a USB 3.0 to Sata 3 connector made by Startech, along with a few leftover Samsung SSDs I've had in inventory.
The Rebuild Process
Rebuild Prep
Before we begin a re-installation, let's ensure our cluster can remain in good health by doing two things:
- Migrate/vMotion all VMs on the impacted node to different nodes in the cluster
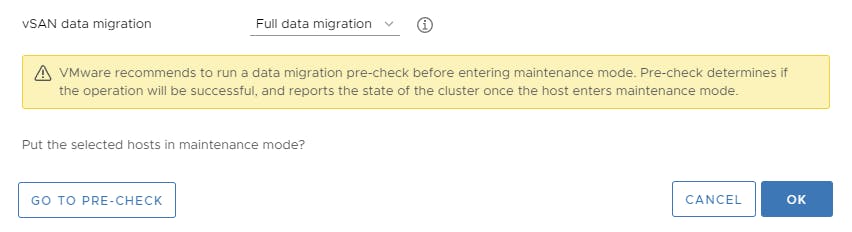
- Put the impacted node into Maintenance Mode w/ a Full Data Migration
Re-installing ESXi
Once the data migration fully completes, we are ready to shut down our impacted node and begin the hardware change.
Once you have completed swapping out your storage mediums, begin the process for an installation of ESXi. I do not have screenshots to share, but I am doing a general installation of ESXi 7.0 off of a provided ISO. I am installing the system onto my new replacement SSD, setting the login information, configuring the management interface to reside on the same IP address/interface as before, and nothing more.
Reconnecting the vSAN Node to vCenter
Once our node is up and reachable by our vCenter instance, we can start by re-connecting the node.
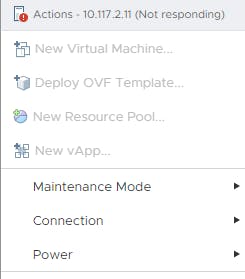
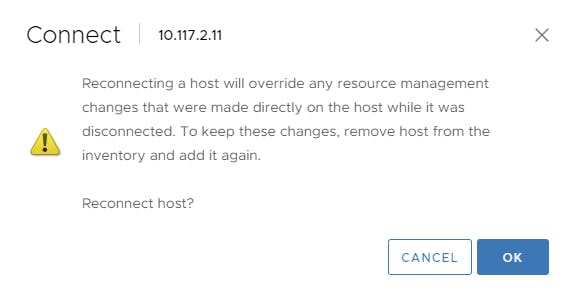
From here you will encounter a failure due to the authenticity of the hosts SSL certificate, and will be prompted to re-add the host. Follow the re-connection steps(re-entering password, accepting the new certificate etc. For the VM location, just press next).
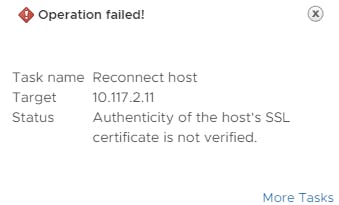
Once you have completed the connection process, vCenter will automatically attempt to re-configure the node. It will fail.
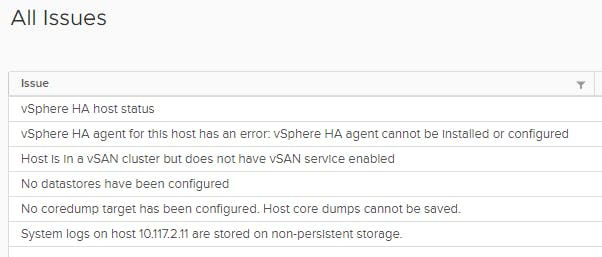
Reconfiguring the nodes distributed networking
If your configuration is similar to mine, you will be using Virtual Distributed Switches to handle the networking for vSAN, Management, vMotion, and other tooling. Simply reconnecting your node will attempt to push these settings to your target node, but they will not completely install. We need to migrate over the configuration of the current node to our desired state.
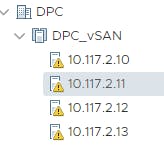
Looking at my newly installed node, we can see it did push some configuration.

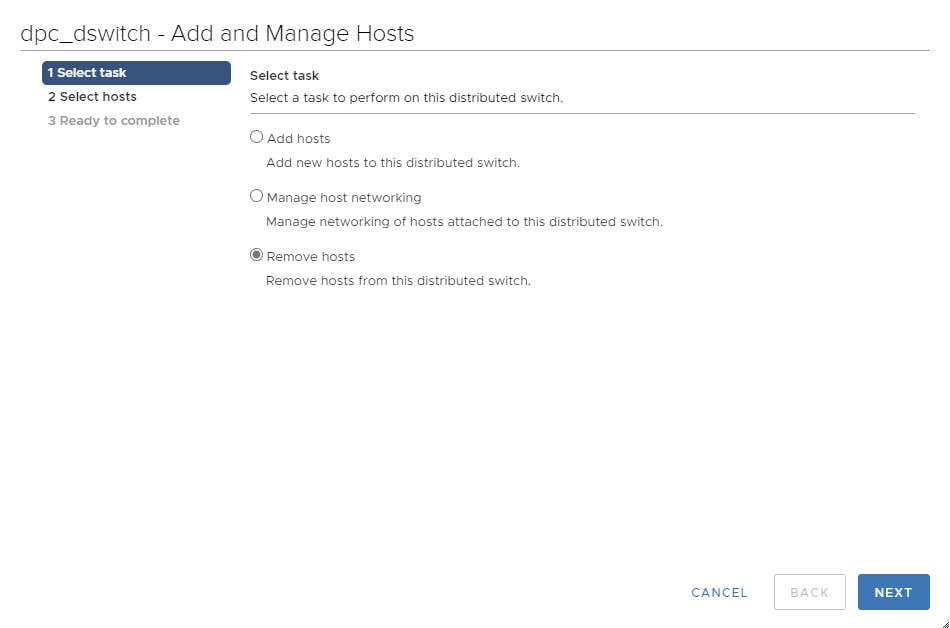
In my specific configuration, I have more than one VDS. I have one specifically for management/vSAN, and another specifically for VMs. Each of these VDS' align to one of the two physical ports on my servers. To restore the proper configuration, head over to the networking tab of vCenter and right click on the VDS containing your management network, and click on "Add and Manage Hosts".
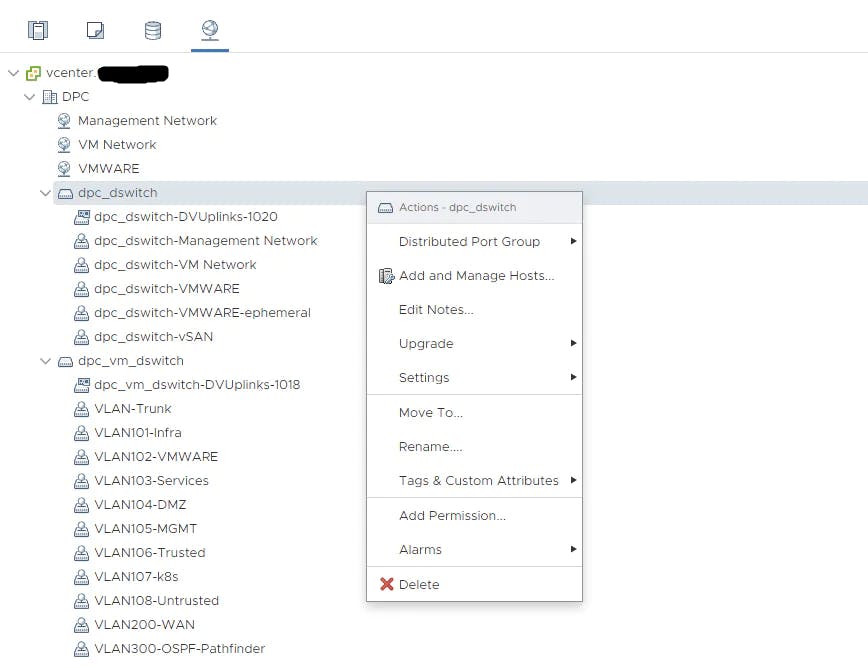
Due to the error in certificates and identification between specific installs, we're first going to fully remove our newly installed node from this VDS.
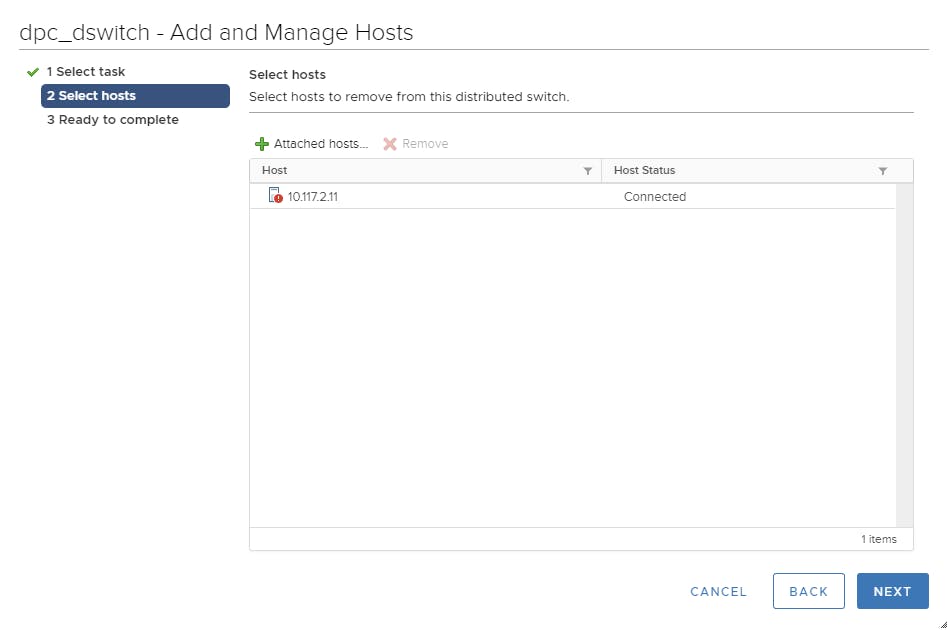
Select Finish. Once it is removed, we're going to go back through the same process, except this time we will be adding our new node.


From here, we have the opportunity to manually define the uplink that we would like our physical interface to utilize. If you have a specific configuration to apply here, please do so. I have defaulted to auto-assign as I am not operating redundant links.
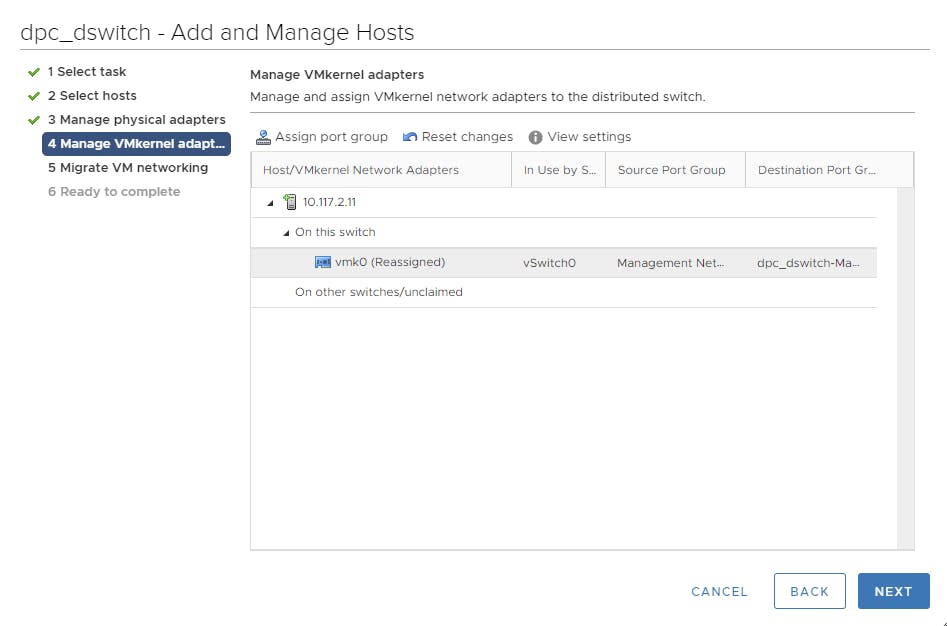
At this step is where we will me migrating our vmk's over from a static port group to our distributed switches. I have assigned the destination port group to be my dpc_dswitch-Management-Network portgroup.
Tab 5 should have use handle migrating virtual machine networking, but as this is an empty node we will not be given any options. Press next and finish to initiate and complete the migration/reconfiguration.
Follow the same steps for all other VDS' you may have configured.
Configure the VMkernel Adapters
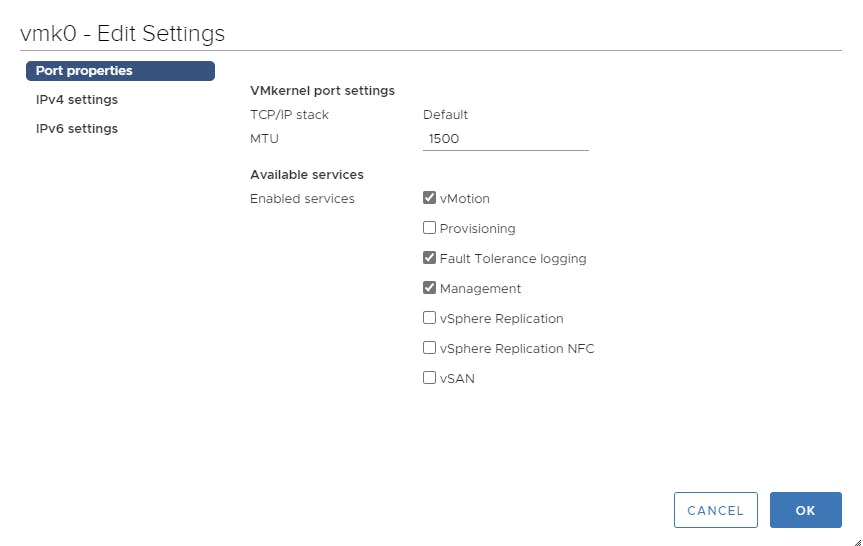
Once our VDS' are in order, we need to manually set the settings for our VMkernel Adapters. Find the page shown below.
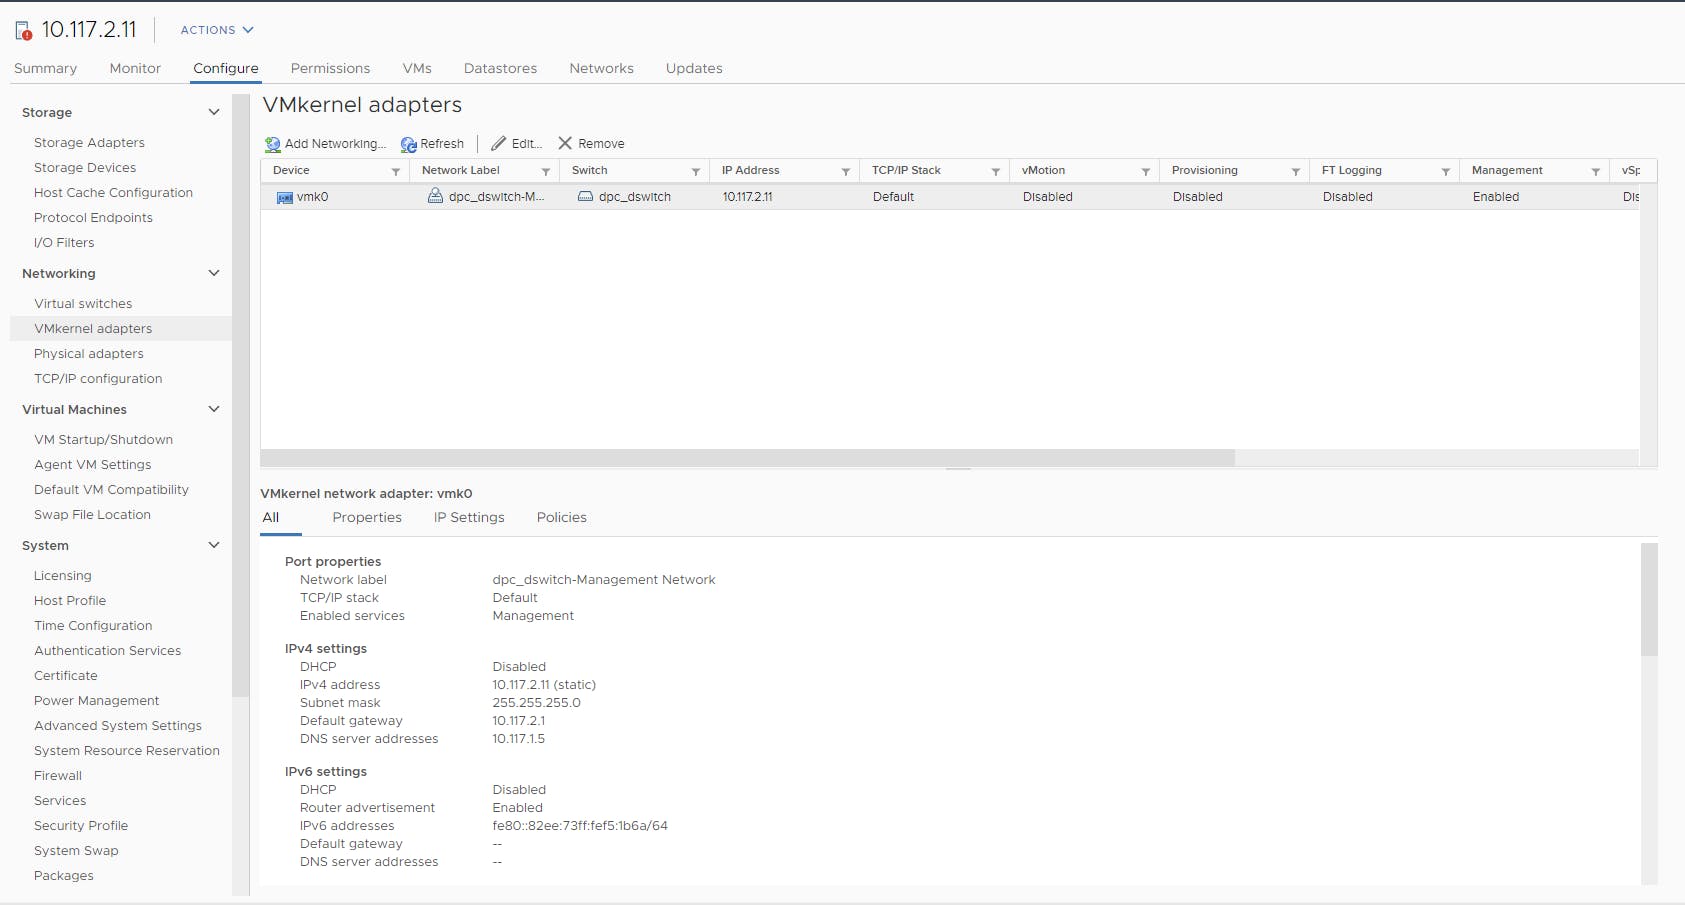
Click on Edit, and add any features you expect to utilize on this VMkernel Adapter. For me, that's vMotion and Fault Tolerance Logging. Press ok, and it will begin re-configuration on your target node. If this VMKernel NIC handles vSAN in your configuration, you can skip the next step of adding an additional VMkernel NIC.
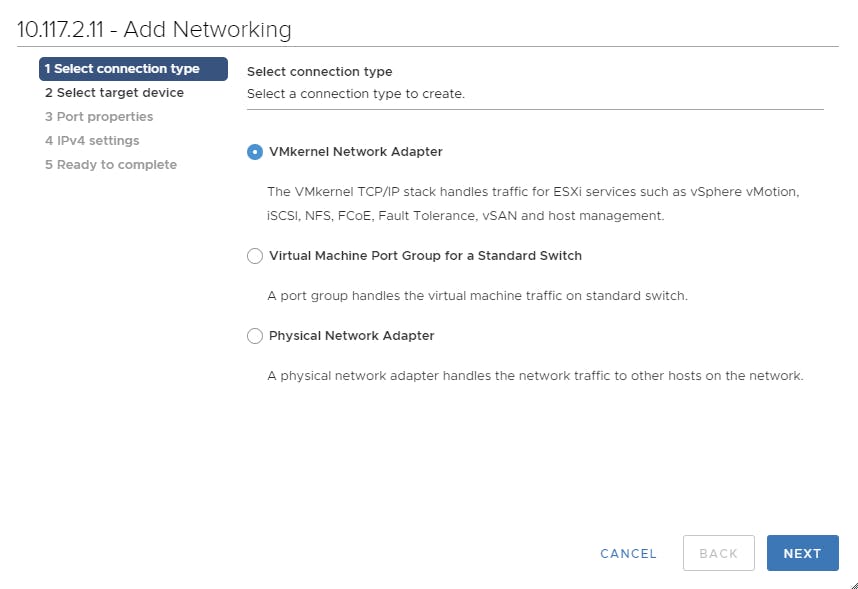
Now, lets add our vSAN VMkernel NIC. Select Add Networking...
Select VMKernel Network Adapter
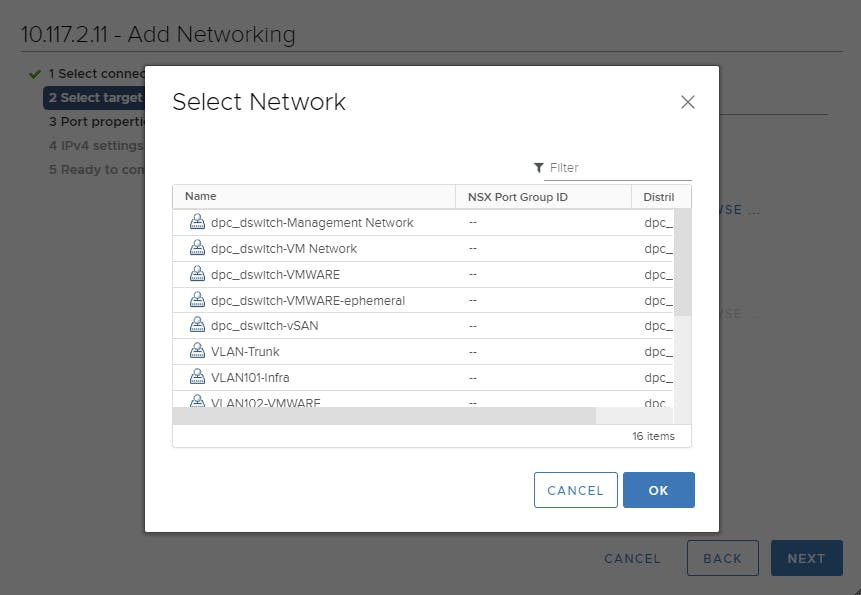
Choose your desired network. I have a vSAN network on a specific VLAN, so I chose the appropriate network group.
Enable vSAN
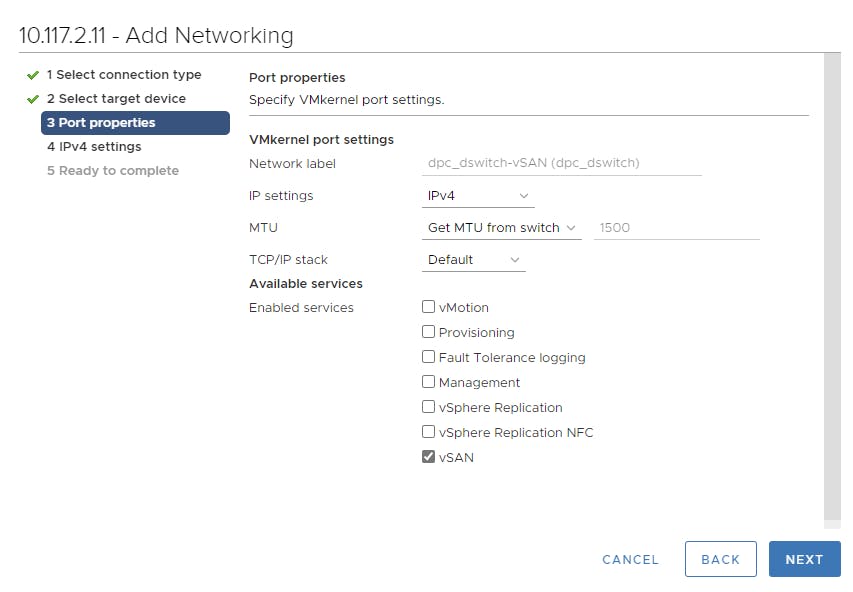
Set your IP Configuration
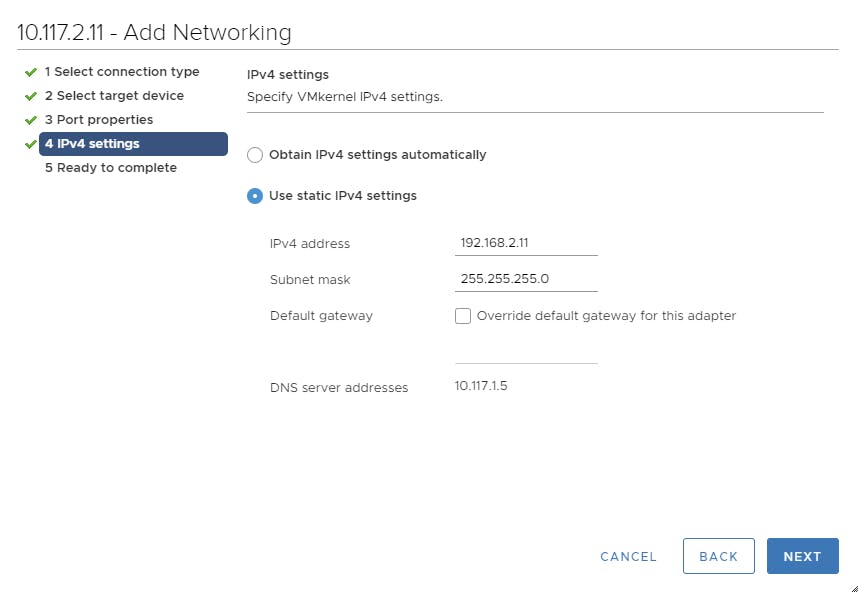
Confirm your changes then select finish.
Remounting the vSAN Disk Group
Once we have our networking in order, we'll need to remount our disks. Head over to your vSANs configuration page > vSAN > Disk Management. You'll see all the nodes in the vSAN Cluster, as well as their Disk Groups. You'll see our new node is throwing a red error. Click on the disk group, then click on the three dots at the top of the UI. You'll see the option to mount the disk group.
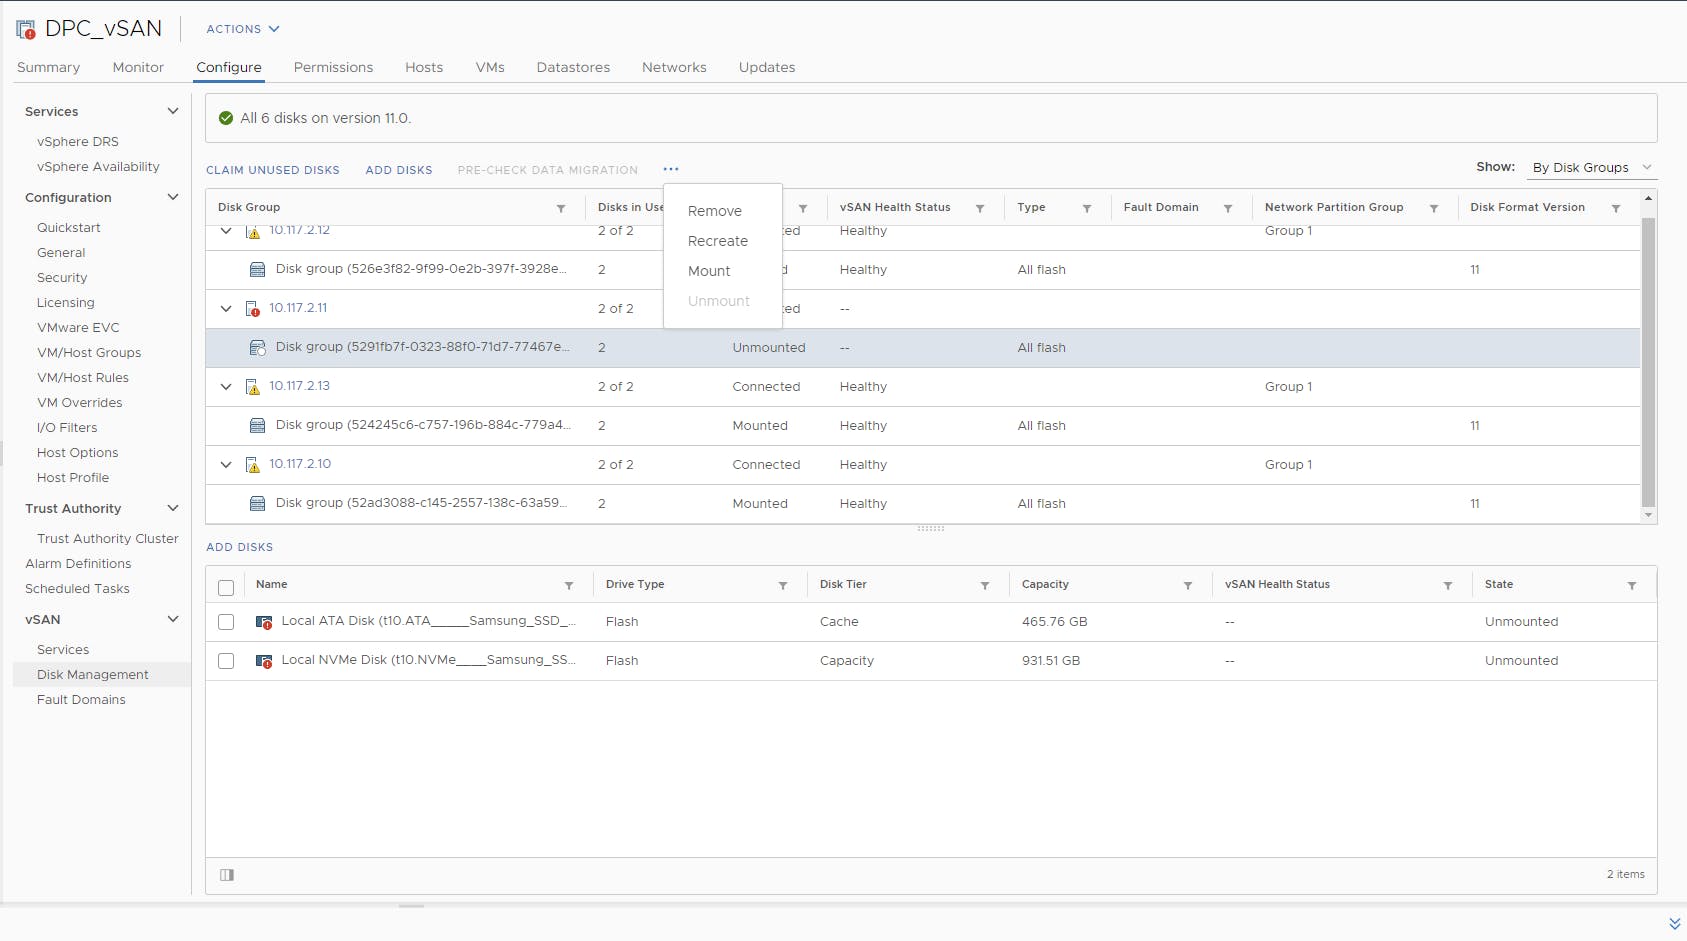
Click on mount. It'll take a while to complete as it re-initializes the disks and mounts them to vSAN. Don't worry, no data is lost or overwritten during this process.

Re-enabling vSAN
Once we have our networking and storage sorted out, we can now re-enable vSAN and rejoin the cluster. To do this, we'll need to SSH into our node. SSH directly into a different/functioning vSAN node, we'll need to pull the Sub Cluster UUID.
esxcli vsan cluster get | grep "Sub-Cluster UUID"
This will print out the UUID we need. SSH to our new node that we're configuring, and join the vSAN Cluster
esxcli vsan cluster join -u <Sub-Cluster UUID>
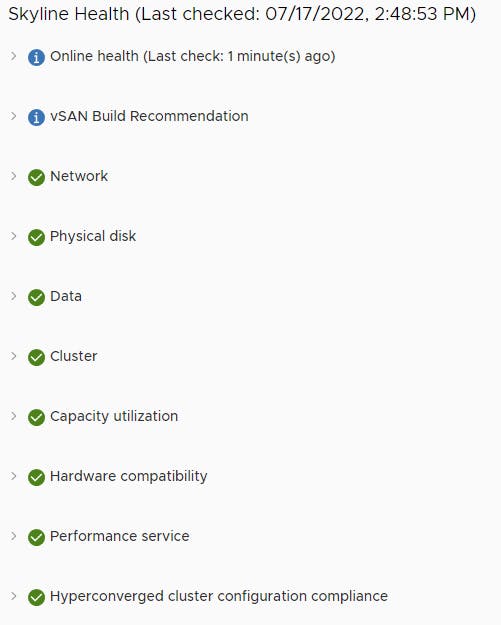
And with that, the cluster is happy! Our node has been reconfigured, it has rejoined the cluster, and all data available should now be viewable in the datastore browser. At this point, feel free to vMotion VMs back to this host.
Miscellaneous Service Configuration
Our node is joined back to our cluster, but there are a few additional things that we could/should do.
The service configuration of this recovered node does not get restored during this process, so we'll want to rebuild the necessary services.
For the current state of my cluster, this only involves configuring NTP.
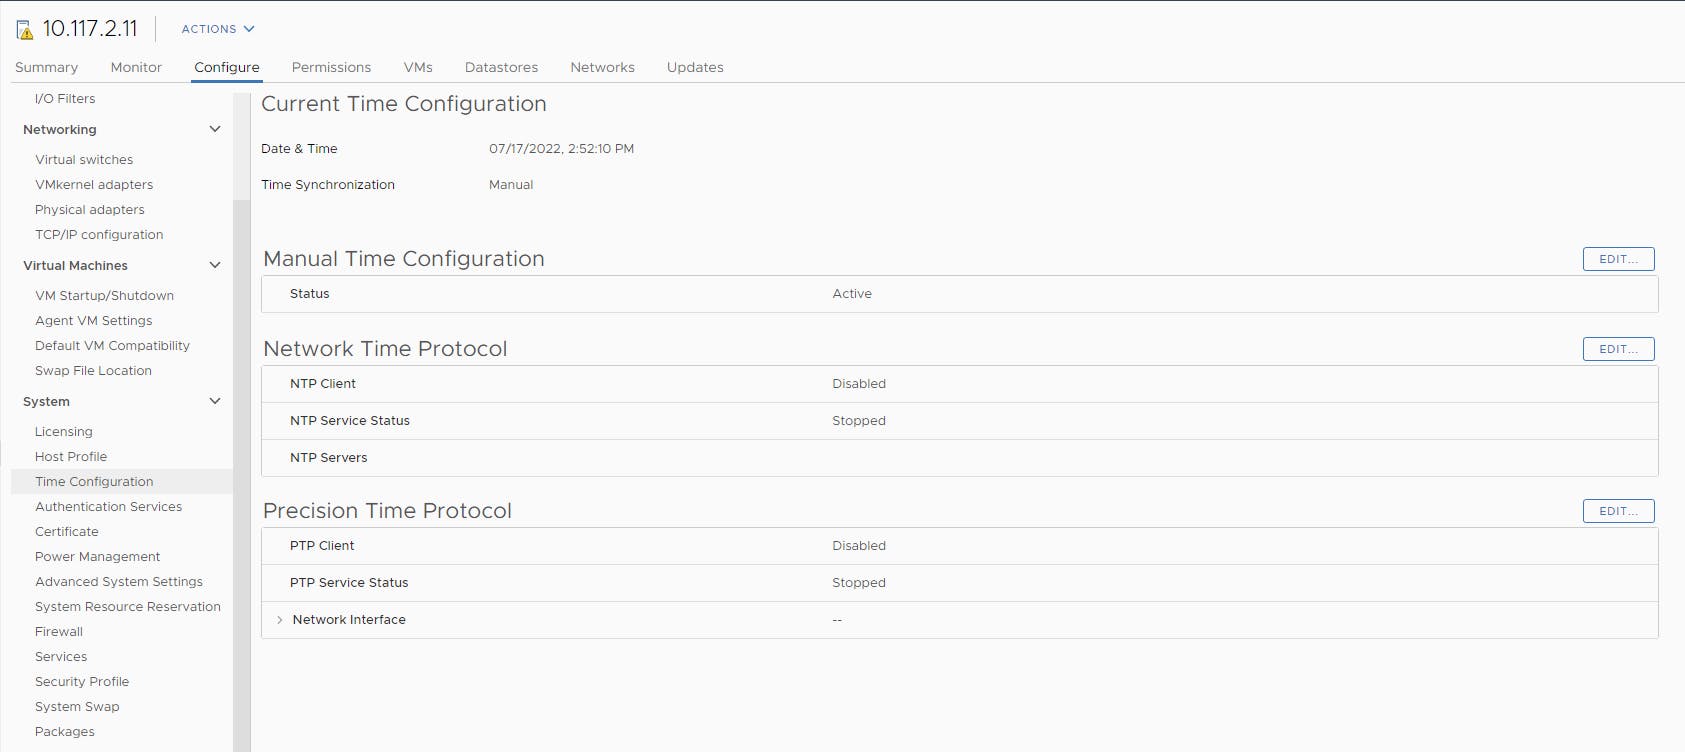
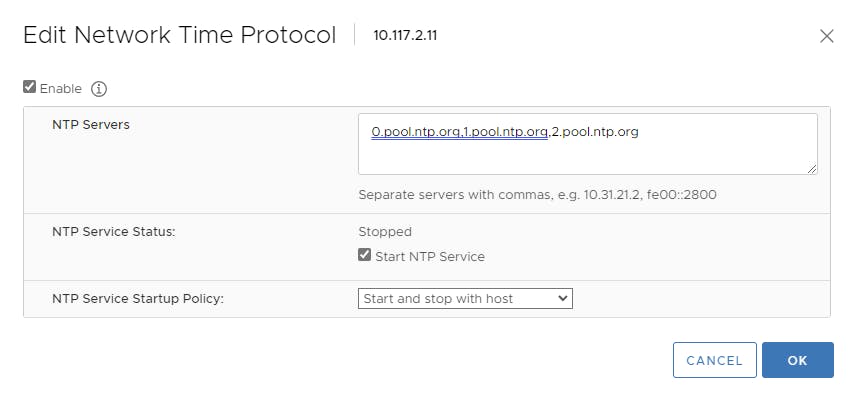
We'll edit our NTP servers, set the service to start and stop with the host, and enable the NTP service.
Feel free to let me know if you have any questions in the comments below.
Thanks for reading! :)
- Dan Gugel